
Disclaimer: This post contains affiliate links. The price is the same to you but I get a small commission that helps me cover some of my blogging costs.
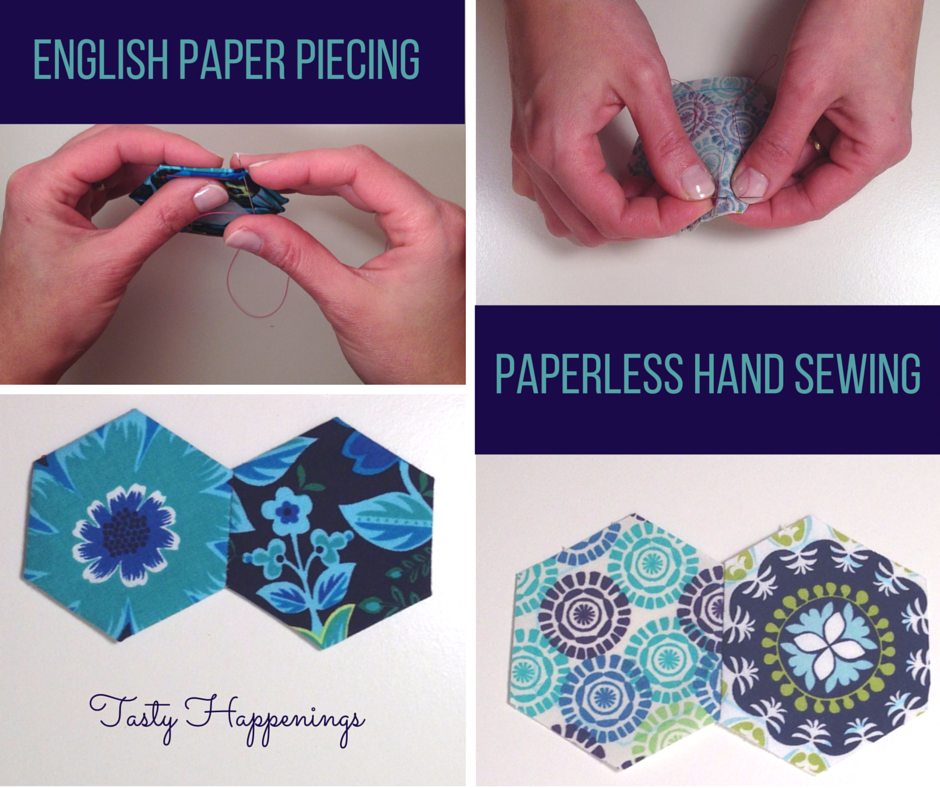
Get your fabric stash out, cause today we’ll be cutting and piecing hexies. A while ago I was bit by the hexie making bug, and I tell ya I could spend the whole day stitching these up! There are basically two ways that you could go about piecing them. The first, most commonly used, is called English Paper Piecing (EPP). Less popular, at least in the blogosphere, is the good old traditional hand sewing (without the paper as a guide). Both methods have their merits and disadvantages. I’ll get into the details as we proceed.
How to piece Hexies using the EPP method
- Cut the desired amount of hexagons out of freezer paper. If you have a Silhouette this task is easily accomplished.

- Iron the hexies to the wrong side of your fabric and cut around the template giving ¼” seam allowance.
- Fold the allowance fabric over to the other side of the freezer paper. As you do this, baste it in place with a thread and needle.

- Join two random hexies with right sides together and whip stitch their edges together. Careful NOT to stitch through the freezer paper, only the fabric! You can see a video of this step on my Instagram feed.

- Open up and move on to the next. And so on until all your hexies have been used.
- Iron the entire piece. Now it’s time to remove the basting and the paper (which can be reused!)


Pros of EPP method
- The actual piecing is a breeze, the edges match perfectly, especially if the base template is cut with a Silhouette.
Cons of EPP
- It takes time to baste the fabric onto the paper, even though it can be a relaxing exercise to some folks.
- The stitches can be seen between the seams of the finished piece. This may not be a huge problem depending on the choice of fabric and thread color.
How to piece Hexies without a paper template (using a Silhouette)
- Cut fabric ½” smaller in height and width than the size of your Silhouette mat. I recommend using the 12x24 mat so you can get more hexies marked at a time.
- Spray Terial Magic
or Fabric Starch
onto the fabric and iron, following manufacturer instructions.
- Draw hexagons in Silhouette Studio (using the polygon tool)

- Place fabric with right side down onto the mat. It is very important to have a really sticky mat for this to work. Load mat to Silhouette. Insert a fabric marker (that disappears with water) into the Silhouette pen holder. Choose "Silhouette Sketch Pens" in the cut settings. I reduced the speed to 3 and increased the thickness to 25.
- Once it is done, use scissors to cut around the hexagons, giving a 1/4'' margin for the seam allowance.
- Now it’s time to piece them! Place two hexies with right sides together and pin at the endpoints. Make sure the corners that were marked with the pen match precisely.
- Stitch up and down along the line marked with the fabric pen. Make the stitches close to each other and backstitch the first as well as the last stitches.

- Join the other hexies in a similar way.


Pros of the paperless hand sewing method
- Takes less time if the markings are done with a Silhouette.
- Stitches don’t show between the seams.
Cons of the paperless hand sewing method
- Requires more patience and attention when piecing hexies together.
As you can see each method has advantages and disadvantages, depending on how you like to sew and your tools. I really enjoy finding out new ways to use my Silhouette machine and marking fabric may just become my new favorite. Stay tuned, cause next week there is more!

Now it’s your turn, how do you like to piece your hexies?
No comments:
Post a Comment